Week 3. GitHub
| Compartmentalized | Documented | Extendible | Reproducible | Robust |
Overview
This week I will cover the basic GitHub skills plus a few more Git skills.
Key GitHub.com skills.
- How to use issues.
- How to use releases.
- How to use organizations—for yourself or a team.
Getting started collaborating using Git and GitHub
- How to set things up in your shared repository in order to work as a small team.
A few more Git skills
- How to revert changes
- How to add files to .gitignore
Tips:
- How to issue a Git command in a terminal window.
- Where the Git info is hidden in a repository.
Topics I won’t cover during lecture:
- Working with Git from the command line. For most of you, you have no need for this and this is just a good way to mess up your repository. The exception is a few unique cases where you do need to issue a Git command (like
git pushfirst time you need to give RStudio your GitHub login). - How to do a pull requests. I’ll post a video. Most of you won’t need this.
- Branches If I have time at the end, I’ll go into branches again. I’ll also stay on after the lecture to talk about them. Branches are handy though not essential. If you use them, it is essential that you understand what is happening with your file system and how you need to change your workflow to make sure you don’t run into trouble. Things like: 1) Always access the files in a repo via a Git GUI not your regular file viewer! 2) Stop using time stamps on files as an indicator of when a file changed.
Prep for Week 5
This is for the R packaging sessions in 2 weeks. Just to test if this works for you (so I have time to trouble-shoot if not).
For those of you with RStudio Cloud account: Click this: https://rstudio.cloud/project/2574138 When it opens, click the Build tab (upper right panel) and then ‘Install and Restart’.
Then run this code (lower right panel)
library(TestPackage)
dat <- WWWusage
littleforecast(dat, nyears=100)
Key GitHub skills
Issues
- Use the Issues in GitHub to enter any issues (bugs, feature changes, notes).
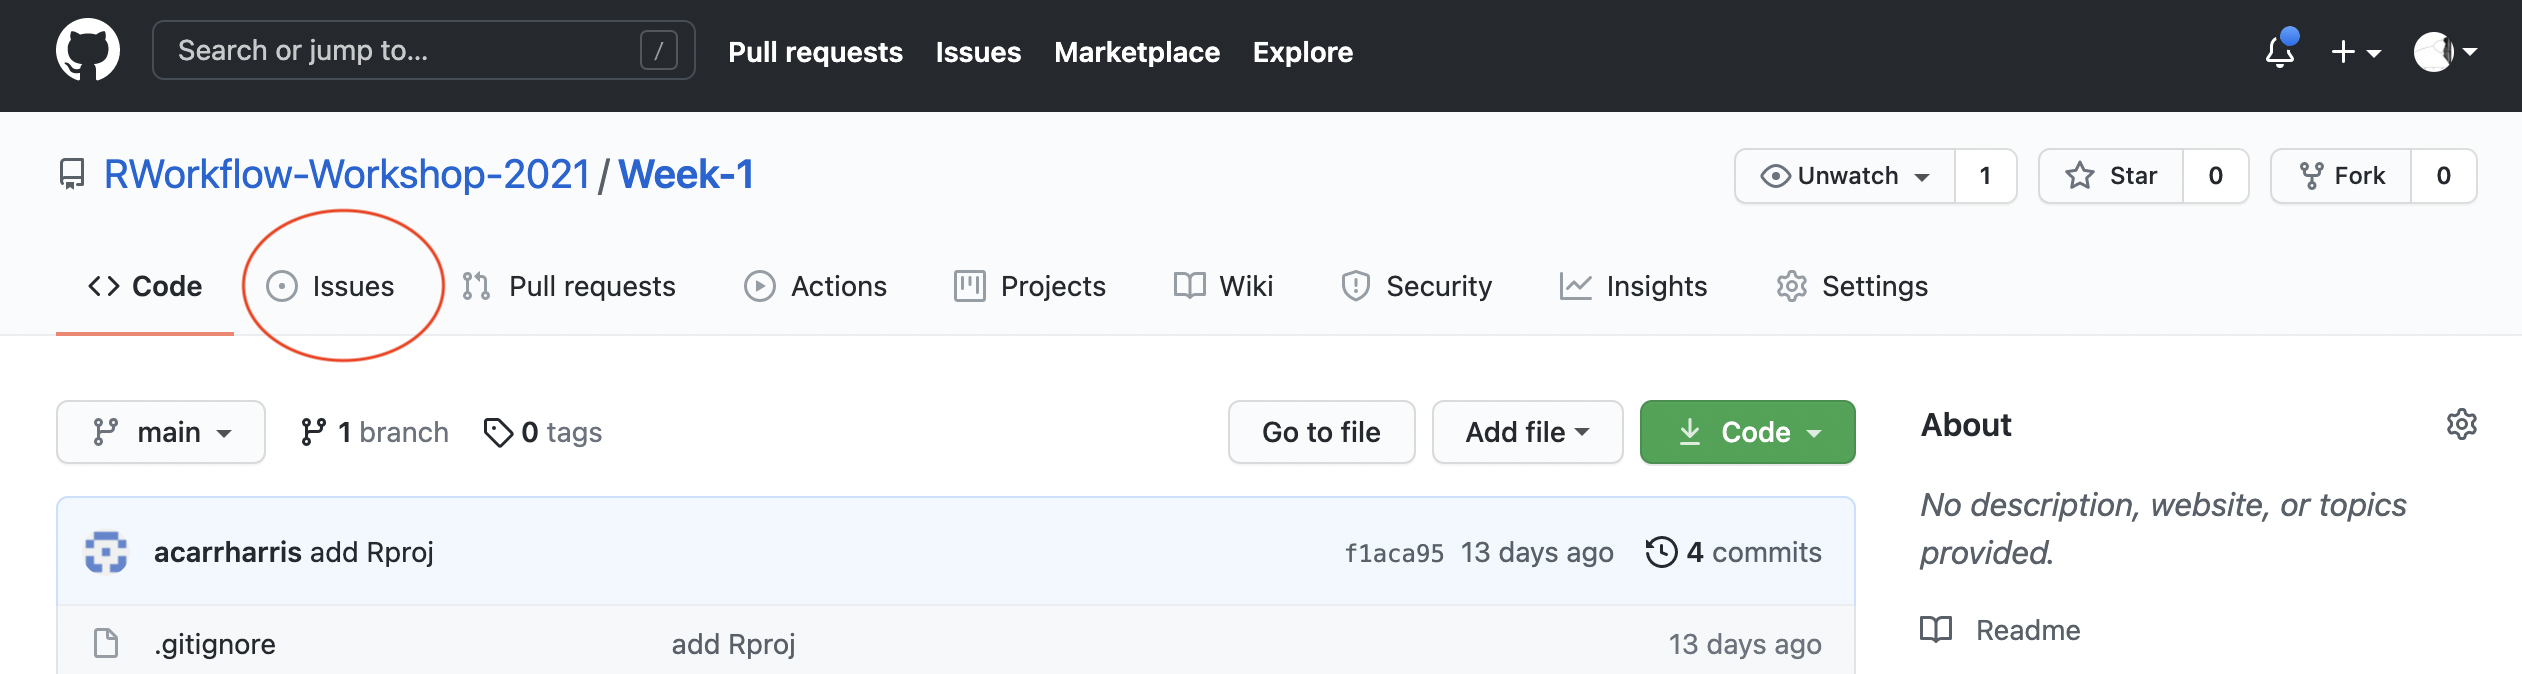
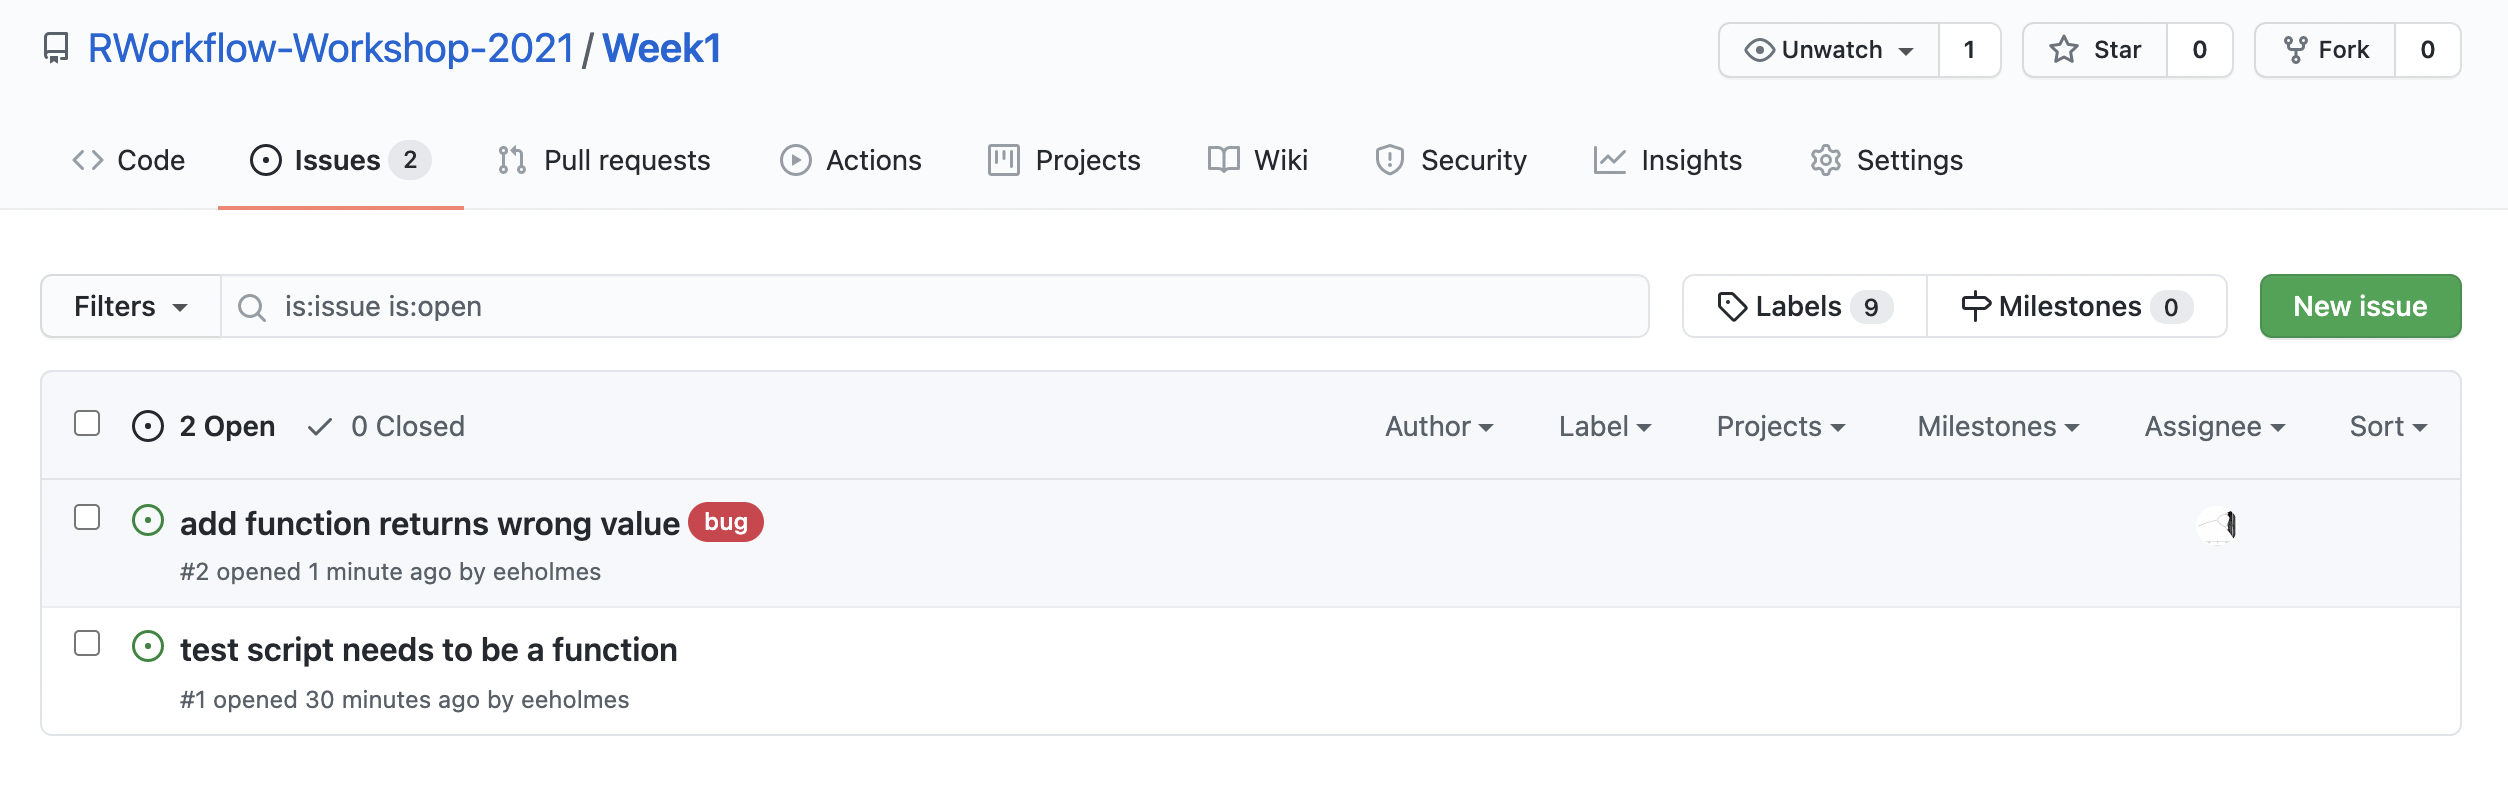
- Add code to your issue so you can easily recreate the problem.
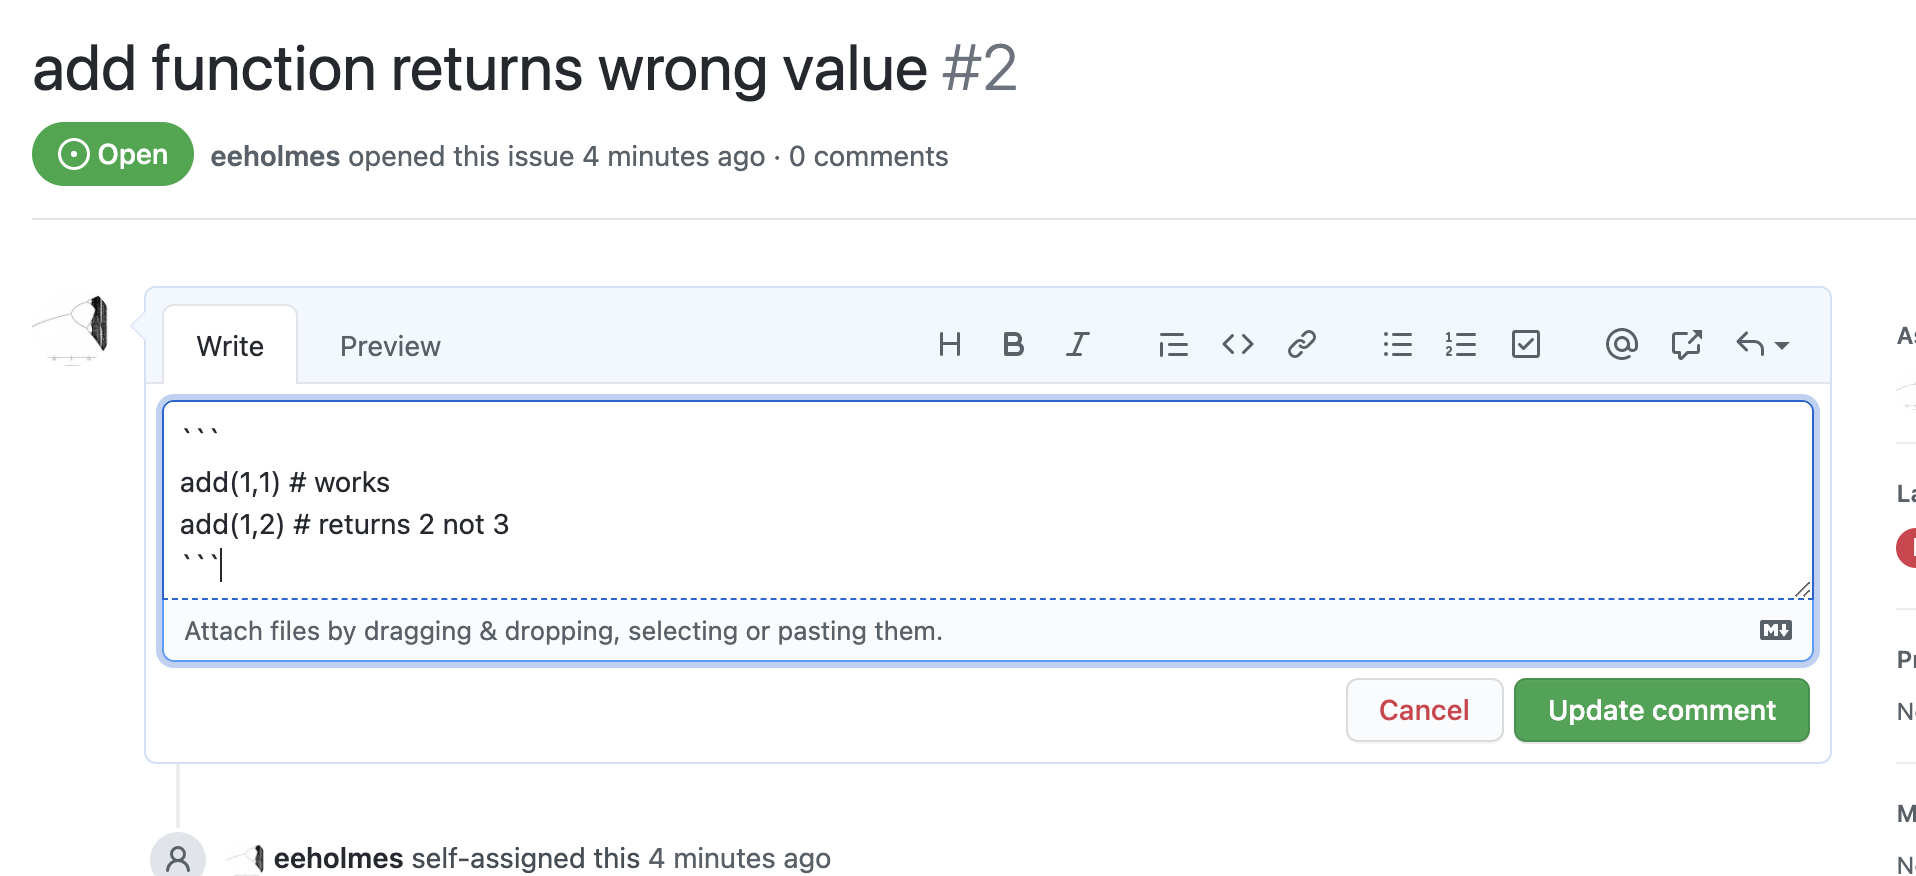
- You can reference issues in your commits with #
Releases
- The release or tag feature in GitHub will help you go back in time and document working states
- Use a NEWS file to keep a notebook of all your major changes.
Pro tip checkout the state of the repository at the time of a release. From the terminal:
git checkout v1.0When done:
git switch -Warning git checkout ... will change all your time stamps.
Organizations
I use this to organize collections of repositories.
- Share access to repos across a team
- Have team discussions
- Have a organization landing page
GitHub Pages
- From your Readme file
- Next week, we’ll cover making a landing page from RMarkdown using RStudio.
Pro tip: Using GitHub Actions
You may have heard about them. Let’s see it in action. We make a GitHub Action that will update our Readme file whenever a relevant change happens. We’ll see a bigger example next week with RMarkdown reports.
To set up our action:
- Create a .github folder in our repo
- Create a workflows folder in the .github folder
- Create a file
render-readme.ymlwith the instructions for what to do to make the Readme.md file.
Our yml file has a set of instructions to the server that is going to do the work.
on:
  push:
    paths:
      - README.Rmd
      - test.csv

name: Render README

jobs:
  render:
    name: Render README
    runs-on: macOS-latest
    steps:
      - uses: actions/checkout@v2
      - uses: r-lib/actions/setup-r@v1
      - uses: r-lib/actions/setup-pandoc@v1
      - name: Install packages
        run: Rscript -e 'install.packages(c("rmarkdown", "knitr"))'
      - name: Render README
        run: Rscript -e 'rmarkdown::render("README.Rmd", output_format = "md_document")'
      - name: Commit results
        run: |
          git commit README.md -m 'Re-build README.Rmd' || echo "No changes to commit"
git push origin || echo "No changes to commit"More Git skills
Getting rid of changes you have made
Say you made a change and you need to get rid of that. The temptation (for me) is to jump onto the Git command line and clobber my repository with reset and revert commands. Don’t do this. Here are some strategies that will make this let prone to leaving your code a mess.
Have you commited the changes yet?
No? Easy click on the file in GitHub Desktop, right click and click ‘Discard Changes…’. Note this will take things all the way back to your last commit!! If you have been making a bunch of changes without committing those, then you are out of luck.
Yes? Go to History in the GitHub Desktop window, click on the commit and click ‘Revert’. This will get rid of all the changes that went with that commit. So if you changed multiple files, all those files will be reverted. If you have pushed the changes to GitHub, then you can push the revert and it’ll show up on GitHub too.
Recovering a single file
Let’s say you made a big multi-file commit and you want to revert one file.
You can do this at the Git command line, but I find that to be a huge time suck and in my early Git days, I sometimes left my repository with a horrible problem that I could not fix and had to completely rebuild my repo. Since I don’t need to be a Git wizard, this is what I do when I want to go ‘back in time’ for a single file.
Assuming you have already pushed the changes up to GitHub
- Go to the repo on GitHub
- Click ‘commits’ It’s a little icon above your code with a clock with a counter-clockwise arrow.
- Scroll to the commit where the file was in the state you want (one before the last bad commit).
- On the right click the
< >to browse your repo at the state in time where your file was ok. - Click on the file and copy the text.
- Go back to RStudio, open the file, and paste in the text from when it was good.
If you have not pushed the changes up to GitHub.
- Now you have to go to the Git command line. Git tab in RStudio and then click the cog > Shell.
- Note, in 9 times out of 10, I would push the commit to GitHub and then use the above copy/paste to avoid using the Git command line. I would find that much faster.
Ok, here’s the Git command to get a single file back. This works whether or not you have pushed to GitHub. The problem with this and why I don’t do it is that I usually need to look at the file. So I am scrolling back through the status of my repo in the past until I find the status that I want. Then I stare a bit and think and think. Then get a coffee and think some more. Then I scroll back through the status of the repo in the past some more and THEN I do the copy and paste. It is rarely the case that I know exactly what commit that I need to get rid of—and even rarer that I want to go completely to a status in the past.
- Open the Git bash shell
git logto find the commit hash (the long number)git checkout 1d0f8c2eb4e66db0a7123588ae2fad26a6338303~1 -- ./R/test.Rwould reset test.R to one before that commit. This part1d0f8c2eb4e66db0a7123588ae2fad26a6338303is the bad commit hash and this part~1means what the file was like 1 commit before that.
If you accidentally leave off the file name and Git says you have a detached head, use git checkout master to reattach your head.
Resolving merge conflicts with GitHub Desktop
GitHub Desktop makes resolving these pretty easy.
- If it tells you to fetch commits off GitHub, go ahead and do that.
- Now try to Pull. It’ll tell you that you have conflicts and give you options for what to do.
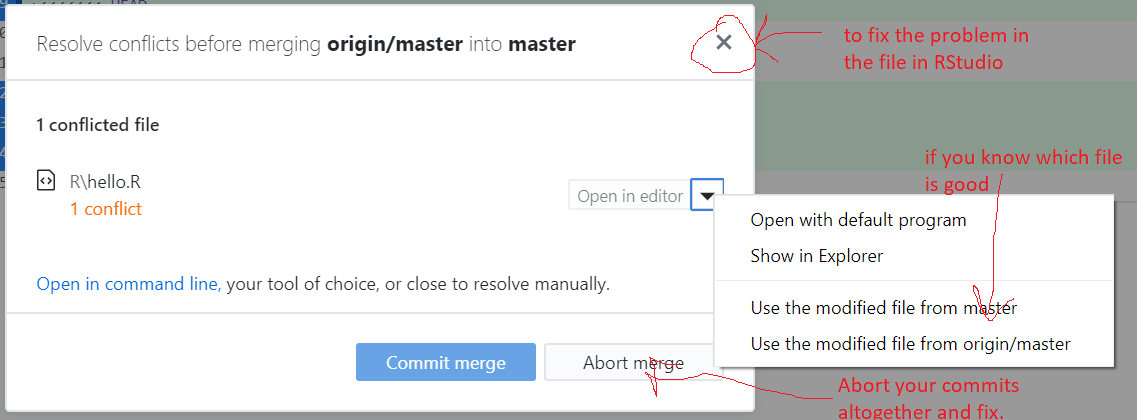
GitHub Desktop merge conflict alert
- Click the ‘x’ and Git will alter
hello.Rand show where the conflicts are. You then edithello.Rin RStudio to fix the conflicts. - If you know what file you want to use, use the little arrow dropdown to use the file on GitHub or on your local machine.
- Use Abort Merge to abandon the merge. Your changes to
hello.Rare still there.- Click on History, right click the commit and revert to get rid of it. All file changes that are part of that commit will disappear! You can revert the revert if needed.
- Go into
hello.Rand fix the conflict. Git won’t have marked it so it might be hard to find.
Those using Git in RStudio Merge conflicts are a bit of a disaster in RStudio, and RStudio gives no warning before it mucks up your files. So it you are pushing/pulling from RStudio be sure to practice on some toy merge conflicts before you run into a real one.